Showing posts with label crafty project. Show all posts

Thursday, April 22, 2010

Cute Baby Shower Idea (and some announcements)

On Sunday, I went to a baby shower for my precious cousin, Whitney. She is pregnant with her first child, a baby girl!

My Aunt Pat, (Mom’s youngest sister), hosted the shower at her home.

IMG_0085

Like a goof-ball, I forgot to take my camera, but I did snap a few pictures of the decorations on my phone.

How cute is that tu-tu around the punch bowl?

IMG_0086

My favorite little decoration was these adorable little baby booties my Aunt Pat made with styrofoam cups.

Aren’t they adorable?!

Of course, I had to have a tutorial!

IMG_0088

We gathered around the kitchen counter as Aunt Pat showed us how she made them.

First, cut the top off of the styrofoam cup.

IMG_0102

Then cut two slits in the cup about an inch apart…

IMG_0104

Push the middle section between the two slits back…

IMG_0105

Then fold the sides over the middle section…

IMG_0108

Secure the pieces with a staple and glue a little pink or blue ribbon on top of the staple. Aunt Pat put some netting in the bootie to hold the candy mints. Too cute!!!

IMG_0109

Thanks for the demonstration, Aunt Pat!

I just had to take a picture of these strawberries…you don’t even want to know how many of these I ate! :)

IMG_0084

And I had to have one of these too. They were “melt in your mouth” good!

IMG_0087

There were beautiful pink roses that greeted us when we walked in the front door..

IMG_0092

A cute little vignette with Whitney’s framed baby shower invitation…

IMG_0093

I wanted to steal this bear! Shhhh…don’t tell anyone…

IMG_0094

A few baby decorations hanging from the chandelier…

IMG_0096

And look at one of the presents Whitney got…

IMG_0099

My mom’s cousin, whom we all call “Baby Doll”, ordered this from one of my sponsors, Red Letter Words. It was absolutely beautiful!!

It was a wonderful baby shower and such a blessing to celebrate this very special time in Whitney’s life!

************************

I also wanted to share an announcement with you.

correct-paradeofhomes

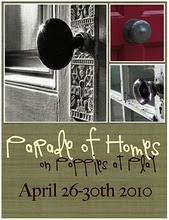
Monday I will be participating in a blog Parade of Homes at Poppies at Play!

I was so honored (and a little intimidated) to be invited. I don’t really feel like my home is worthy of being in a parade of homes, but I had to take advantage of such a wonderful opportunity.

I am trying to get my master bedroom renovation finished in time for the Parade. My home (3 rooms) will be featured on Monday, and the Parade will continue throughout the week. I hope you will join me!

Secondly, be sure to mark your calendar for my second linky party, “Best DIY Projects of April.” It’s next Friday, April 30th!

That’s only one week away!

large april

I hope you can come!

Have a blessed day!

Traci

Thursday, April 15, 2010

$4 Artwork for my room

Well, you know that I am trying to accessorize my master bedroom on the cheap, so today I stopped by the Habitat store and picked up a couple of frames.

They were only two dollars each, so I spent a whopping $4.00!

They are matted for a 8 x 10 picture which is exactly what I needed.

IMG_6259

I spray painted them both black and sanded the edges just a bit.

I got my artwork for the frames from Vintage Printable online…just printed them off of my computer right at home!

There is a wealth of vintage prints that you can download and print for FREE! Love that!

I turned the mat around in the frame so it would be white instead of cream, and added the bird’s nest prints that I downloaded…

IMG_6263

I still do not have the side tables for my room figured out, so right now I just have a table from around the house sitting there.

IMG_6264

I am wanting to find a desk for this side of the room..

IMG_6266

As you can see, I am trying to add touches of blue to the room. It was needing some color!

IMG_6267

Not bad for FREE!

IMG_6269

This one is my favorite. I love the little blue eggs…

IMG_6271

I am hoping to find some matching lamps for both sides of my bed. Lamps are so expensive, so I am trying to find some at a thrift store.

Another great site to get free prints is The Graphics Fairy.

Here are some I downloaded from her site…

IMG_6273

She has a ton of cool pictures, not just birds.

The pictures I made really added a nice touch to the room, and they were totally worth only $4.00!

So if you are needing artwork for your room, be sure to check both of these sites out!

If you haven’t already, be sure to enter my Lisa Leonard giveaway!!!

image

Click HERE to enter.

The two winners will be announced Friday!!

Have a blessed day!

Traci

Monday, February 22, 2010

Candle Makeover

I spent the weekend on several projects, but unfortunately none of them turned out quite the way I had hoped.

So I will be tweaking them this week and hopefully sharing them with you soon.

In the meantime, I will share with you a fun little project I tried last week.

I got my inspiration from a magazine I was flipping through at a bookstore.

It was a picture of a grouping of candles covered in sheet music.

I went off to Hobby Lobby to buy some candles and scrapbook paper.

I was hoping to find some sheet music scrapbook paper, but they didn’t have any.

So I chose a paper that looked like script writing.

IMG_5579

I also got some brown ribbon, but ended up not using it.

First, I covered the back of the paper with ModPodge.

IMG_5582

Then I wrapped the paper around the candle and trimmed the excess. When it was mostly dry, I added another layer of Mod Podge on top of the paper.

IMG_5584

Then to give it more of an “aged” look, I added a layer of Valspar Mocha Glaze with a paper towel.

IMG_5644

I had three candles. One tall one, and two medium ones.

IMG_5591

I wanted them to all be different sizes, so I cut the bottom off of one of them with my electric knife.

Yup. I did.

IMG_5602

That little electric knife was “going to town” but was having trouble cutting all the way through the candle.

So I had to get out the “big dog” and finish it up.

IMG_5603

Oh….the crafty wisdom I share on this blog!

Okay. Maybe not the best method. But I got the result I wanted. I stuck them in the wooden fruit stand I made last week to see what they would look like.

IMG_5614

The candles in my inspiration picture from the magazine had cute little ribbons hanging from them.

I tried several different ribbons, but couldn’t get the look I was after.

So a resorted to my old friend, Mr. Burlap.

I thought I took a picture of the next step, but I couldn’t find it.

I took my tan burlap and spray painted it black. I’ve never tried this before, so I was feeling rather brilliant for coming up with the idea.

I love burlap. I love black. I love black burlap!

Then I cut a strip of the burlap and wrapped it around my candles.

IMG_5620

But it needed something more.

So I took the “Spare Parts” that I had left over from my Magnet Board tutorial, and added a little bling.

image

IMG_5605

I think I like it better with the bling.

IMG_5627

I am not totally blown away with the results, but I am blown away with how easy it was to do.

I started thinking about how cute it would be to wrap candles in a damask print or an animal print. There are so many different types of scrapbooking paper that you could find something to match the decor in any room in your house. You could embellish the candles with just about anything…monograms, jute string, ribbons, charms, etc.

Let me know if you try this and send me some pictures. I know you ladies will come up with some beautiful ideas!

I am linking this project to:

Metamorphosis Monday at Between Naps on the Porch

Make your Monday at Twice Remembered

Make it for Monday at Cottage Instincts

Get your Craft On at Today’s Creative Blog

DIY day at A Soft Place to Land

and more to come.

Have a blessed week!

Traci

Check out my new Sponsor!

image

Thursday, February 18, 2010

Wooden Fruit Stand

Last month I found a cute little wooden fruit stand at Goodwill.

IMG_5588

I guess it’s a fruit stand? I’m sure it could hold many other things as well.

My eye was immediately drawn to it because of it’s shape. I loved all of the curves all over it. Very cottage-y.

IMG_5586

I wasn’t crazy about the dark wood color, but knew that it would look great painted white.

And it was only $3.50! I knew I would use it somewhere…if not in my house, then in our guest house.

When you are shopping for items at Goodwill, look at the shape or outline of an item. If it is an ugly color or has an ugly picture on it, don’t let that stop you from buying it. Paint covers a multitude of ugliness!

I tried something a little different on this piece. I rubbed all of the edges that I would be sanding with candle wax before I primed it.

Why? Because sometimes I have trouble sanding off the primer to get down to the wood. It frustrates the heck out of me!

I saw somewhere in blogland that someone used candlewax on the edges before painting. So I thought I would give it a try!

After I rubbed all the edges with my candle, I used a spray primer to prime it.

Then I painted the whole thing white. I used Krylon Satin white spray paint from Walmart.

IMG_5598

I had to paint it in the garage and then bring it inside to dry. I cannot wait for warmer weather so I can do more painting outside!

Then I used my sanding sponge to sand all of the edges. I think the candle wax worked! The paint just sanded right off!

IMG_5599

IMG_5600

Ooooh, I loved how it was turning out!

Then for the final step, I applied a layer of Valspar Mocha Glaze to give it a little more of a vintage look.

IMG_5644

I got this bottle at Lowe’s forever ago, and I have done a million projects with it. It lasts for-e-va!

I applied the glaze with a paper towel, and wiped it on and off until I got the look I was after. It’s a subtle difference, but I love how it turned out!

IMG_5601

Then I just put some of my artificial apples I got from Marshall’s in it, and I was finished!

I love it!

Now for a parade of pictures of my little beauty…

IMG_5631 IMG_5633IMG_5632

IMG_5635 IMG_5637

IMG_5639

IMG_5640

Well, that’s all!

A very easy project, but I am so happy with the way it turned out.

Here is a sneak peek of a project I’ll share with you next week…

IMG_5606

Have a blessed day!

Related Posts with Thumbnails